Google Site: Intro
Standards:
Participant will understand and use basic computer skills to research and use web-based tools to complete their ITLP. ISTE 3.D, Alaska 8.D
Google Sites has so many possibilites, from building simple class or course web pages to maintaining a class "wiki." Not to mention the many tutorials, samples, lessons, templates, and support groups online to help you kick off your Google Site pages.
This lesson will provide you with the basics to get started and a quick tour around the site.
DESIGN YOUR SITE
Before you head over to Google Sites, and you will hear this from every web designer, design your site. AKLN ITLP Cohort 1 has designed a series of lessons to walk you through designing your site and setting it up. This can be located here: Create an Online Lesson Using Google Sites.
SETUP YOUR SITE
STEP 1
Now that you have your design in place, we are ready to setup your site. To begin, you will need to login to your Gmail.

To begin with a site is a set of pages under 1 URL or address. For example, Our Cohort Shared Space Address is:
https://sites.google.com/a/aklearn.net/itlp-1-shared-space/home/cohort-1-shared-space-announcements
The first part of the address: https://sites.google.com/a/aklearn.net/itlp-1-shared-space
Shows that our site is Secure (https) and that it is located on Google Sites under Aklearn. It also says the that Landing Page or Home Page is itlp-1-shared-space. Anything after aklearn.net will be a page on the site (https://sites.google.com/a/aklearn.net).
1. In Gmail, use the Google Navigation Menu in the top left corner and click on Sites.
2. You will see a list of sites if you have made any in the past or if any have been shared with you such as ITLP 1 Shared Space.
3. To start a new set of pages or a new site, click on Create new Site.

STEP 2:
Once you have selected create a new site, you will now be asked to give a name to your new site and add some additional setting features.
1. Give your Site a Name, for Example: Hum's Biology 101
2. Change the URL if you would like to keep it simple. Hum's_Biology_101 would turn into humsbiology101
3. Click the plus button on the left of Choose a theme. Select one and save.
4. Give a site category, such as Biology
5. Give site description.
6. Set your Sharing settings. Collaboration means you can choose who you would like to view.

7. Once saved you will see your Home Page with your chosen theme.
8. Notice that every page has a create page, edit page, and more actions in the top right corner. It also has sharing for the site on the left top.
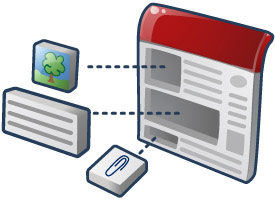
9. Understand what the components or sections of the page are called. The AKLN example2cohort1 is the Header of all the pages. The bar on the left is called a sidebar or navigation bar. (You will see how we can choose to show or hide this.) The page title will be above the content in the center.
MANAGE SITE
Now you need to learn how to manage your site. To manage your site select More Actions in the right hand column. A drop down menu will appear with selections. Many of these selections will allow you to change particular page settings or subscribe to page changes.


But to make changes to your site, select Manage Site. Inside Manage Site, you will notice that you have many features for changing your sites settings on the left hand navigation bar. You can use the Site Content section to organize or examine your pages, examine attachments, or edit page templates. The section below, Site Settings, allows you to change your overall site name, description, and category. This is also where you can delete your site or make a copy of it. (Think student projects)


Finally, you may find that you spend most of your time in the Site Appearance. This section allows you to setup how and where you would like your navigation bar, how your header should look, including custom logos, and finally if you would like to change your theme, colors of your theme or your font.

SETUP YOUR SITE APPEARANCE
1. In Manage Site, Start by selecting Site Layout.
2. Select Change Site Layout at the top.

3. In this window, adjust your site width. Typical browser width is 700-900 pixels. Most often I leave it as theme default.
4. Select whether you would like to see the header, and if so determine the height and alignment. NOTE: It will not hurt anything to play with these features. Make an adjustment. Click save and view pages. Repeat until you understand what the adjustment is doing.
5. Select whether you would like to see the navigation bar below the header or on the side (left or right) and how wide you would like for it to be.
6. Finally select if you would like to display the footer.

7. Finish by editing the Navigation bar. Click on Add a Sidebar Item in Site Layout. Choose Text from the menu, and select add.

8. You will notice that you now have two blocks on the left. 1 for Navigation and one for Text. The Navigation Block is Google's automatic way of tracking and displaying all of your pages for you. I recommend leaving it. You can make small changes like changing the title name or how it is displayed, such as how many levels are shown or if you would also like to show recent activity. This is done by clicking edit in the Navigation bar. If you do not want it, select Delete.
9. To add in additional or special links, click edit on the text block. Type the name of the link. Highlight and click on the Link button in the Edit Bar.
10. You can choose whether you would like for the link to go to the Existing page in your site or another web address.

11. Finally, Select Colors or fonts to change the colors or fonts of your entire site. OR select theme if you have had enough of your theme and you would like to change it.
Below you can find the Video Versions of this Explanation:
Assessment:
| Completed AKLN Online Unit | AKLN Collaborative Online Learning Unit, Lesson or Blog contains all parts from proficient in a contextual (real-life) storyline/ simulation to engage the learner, as well as media (pictures and/ or movies) and helps others to put theirs online. | AKLN Online Learning Lesson or Blog Lesson contains an assessment, standards, process or tasks and lessons to reach final product, final learning product description, online communication tools, and resources to provide help to users. A final reflection entry on the implementation of the unit with suggested modifications is found in self reflection. | AKLN Blog Lesson contains most of the parts in the proficient column. A final reflection entry on the unit is found in self reflection journal. | AKLN Blog Lesson contains 1-2 parts, but many are missing from the proficient column. No reflection entry exists for implementation. |


Comments
Post a Comment